
Creating Song Covers
The steps I took to turn recorded vocals into a final song mix with free software.
 Written by Okom on Jan 24, 2025 in Audio. Last edited: Jan 24, 2025.
Recording vocals
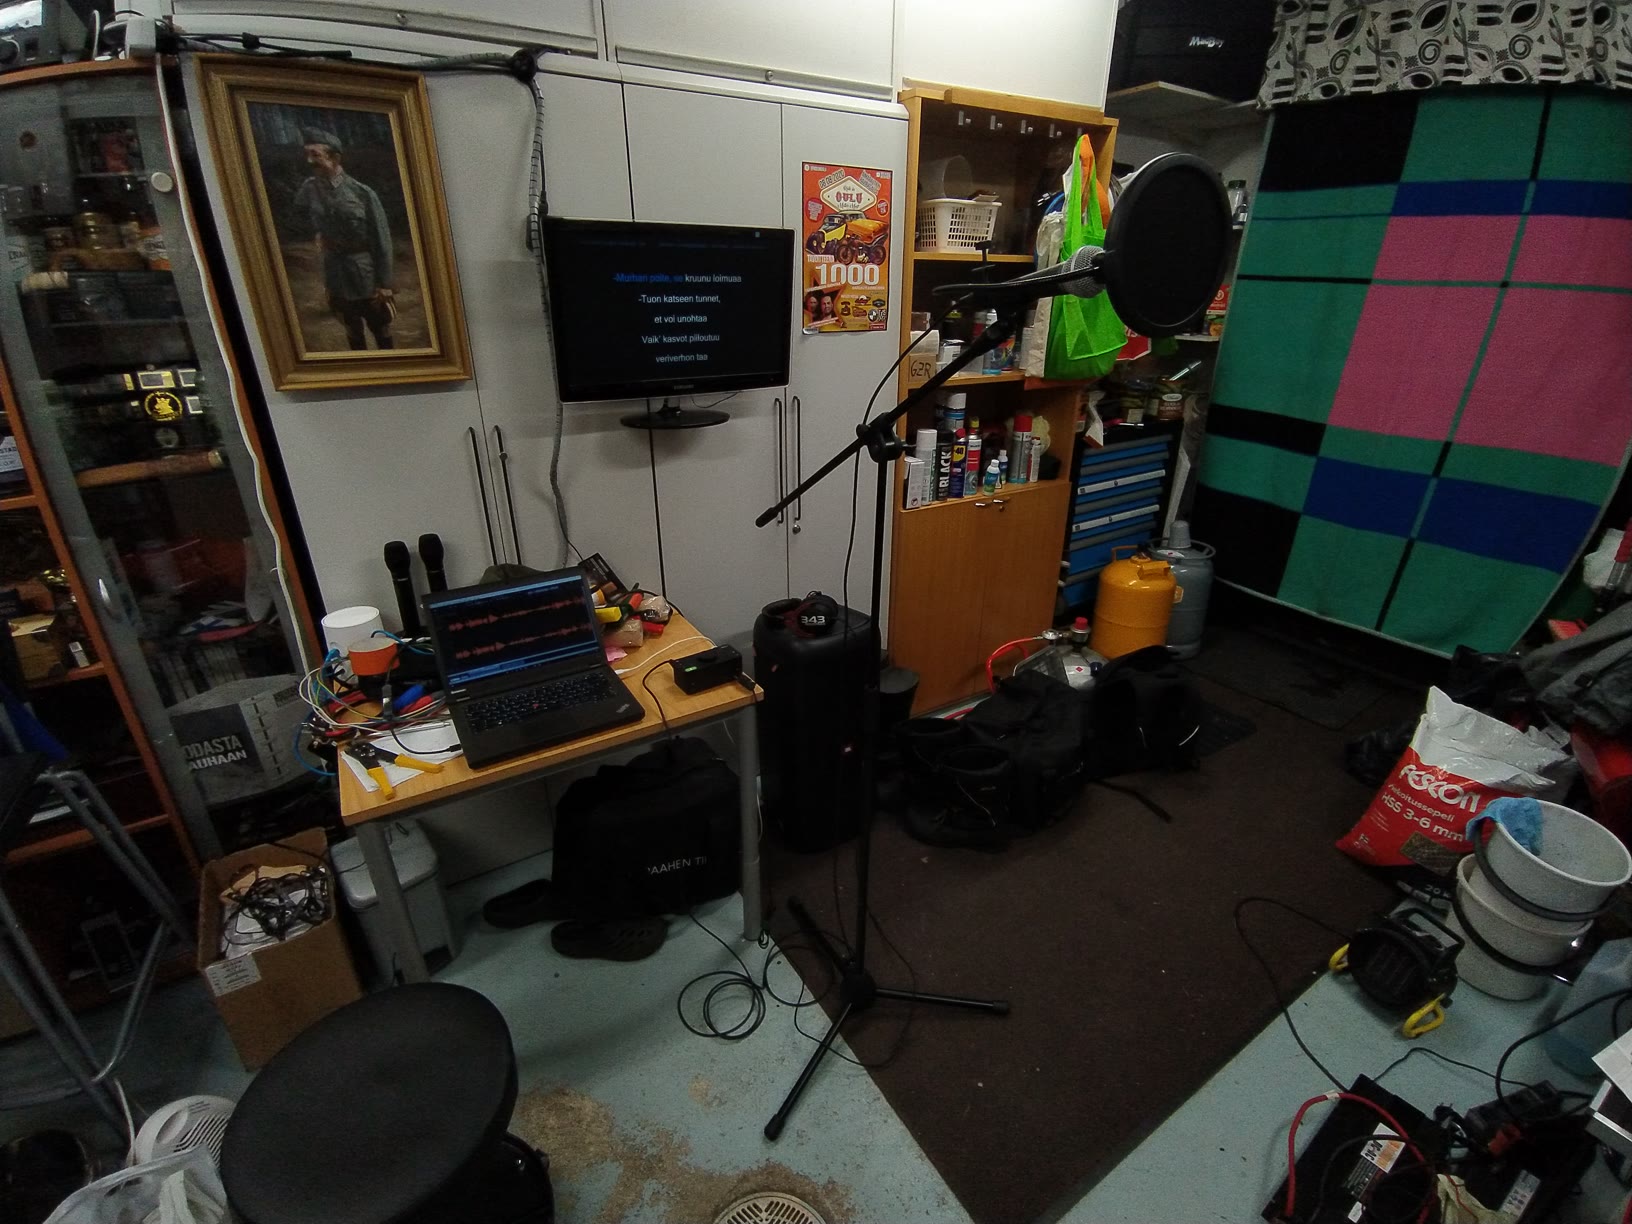
I like to sing karaoke at my parent's place in their garage where my dad has a good sound system and a wireless karaoke setup. Lately though I've been more interested in using my headphones for feedback and my wired SM58 for straight up recording my vocals in a studio-like setting and paying attention to the vocal quality to try and improve in that regard. Knowing how to produce a clean and good-quality vocal track that sounds good in isolation will help me realize how to handle a mic better.
I had done this before when I recorded my vocals for use with voice conversion AI and in the "What I learned" section on the blog post I talked about reducing the proximity effect. The next time I did some recording, I didn't stand so close to the mic which did help with reducing the boominess of the sound, but I noticed that there was an issue with plosives that I hadn't paid attention to earlier.
Plosives
Plosives are sharp sounds picked up by a microphone when a burst of air hits the capsule, most often caused when pronouncing the 'p' consonant. When recording, I had not been using a windscreen or pop filter that would reduce these sharp sounds. As a result, some of those bursts of air would leak into the recording, especially during songs that required high energy.
Pop filter acquired
On Jan 18, 2025 I had the chance to record some vocals in my dad's garage again with the same setup as earlier, but this time I had a pop filter with me. Earlier when I discovered about the issue with plosives, I had tried to counteract it by singing off-axis from the mic, but it resulted in not getting as clean of a sound as possible, so I hoped that the pop filter would reduce the plosives and allow me to sing straight into the mic again.
Recording with the pop filter was really nice as it majorly reduced the plosives to the point where I couldn't even produce them if I tried. It allowed me to feel like I didn't have to constantly pay attention to the plosives when recording, which was important as all that hesitation could heard in the recording.
Deconstructing the mix
Analyzing the original songs
In an effort to improve my singing and mixing ability, I like to take the recordings I've made and try to mix them into a song with the instrumentals to see if I can make a convincing mix. What I've found helps is having the AI-isolated vocal tracks of each song that I can listen to in order to figure out how large of a reverb was used and observe the waveform to see the amount of compression done or the volume of the track in general in relation to the instrumental.
How to process vocals
I had never quite grasped what needs to be done to vocals to make them sit well in a mix until I watched AudioHaze's video on it. I knew that you had to have a good recording to begin with and that there was often reverb added to vocals, but that was about it.
What I gathered from his video was that compression is pretty much mandatory to get the vocals above the instrumental, and that reverb and echo should be on a duplicate track instead of being applied to the main vocal signal. He listed EQ and sibilance control as the other two points, but those to me don't have that much of an impact if the recorded signal is good. I'm not saying they aren't necessary, just that they seem to have less impact than the other points.
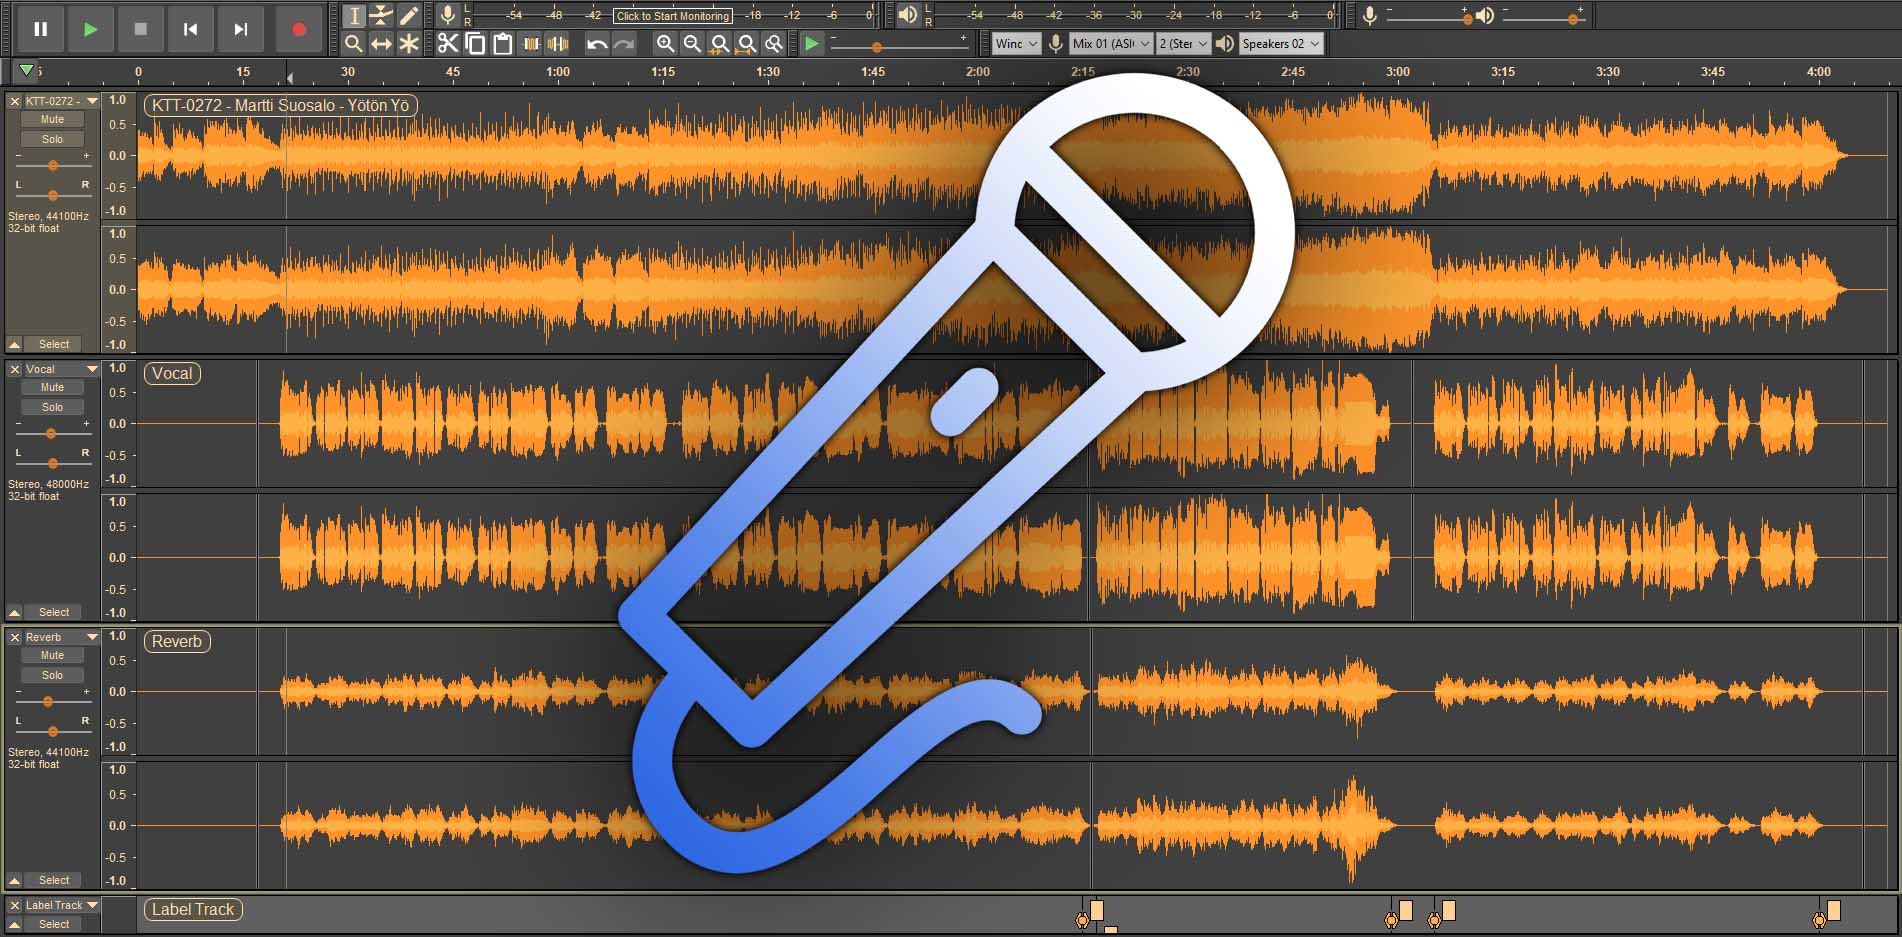
Creating the mix
My DAW of choice was Audacium which is free and open source unlike many DAWs. Although it's missing multiple useful features such as applying filters in real-time or more pleasant graphical filter UIs that proprietary DAWs offer, but I was fine with it for these experiments.
Processing the vocals
I used the same filters for all the four songs I ended up mixing which surprised me as they were somewhat different types of songs, and I was expecting having to fiddle around with the filters more per each song. The filters I used were the following:
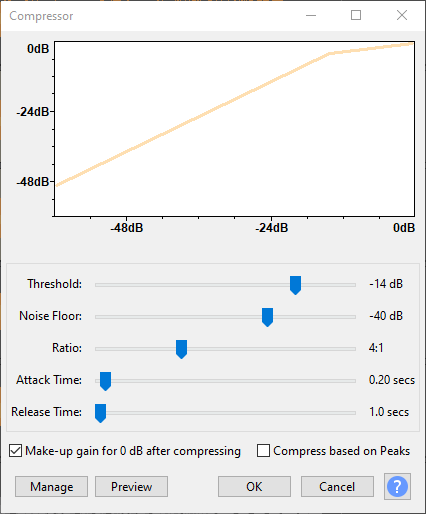
Compression
Compression made the quieter sounds louder which allowed the vocals to be heard over the instrumental more.
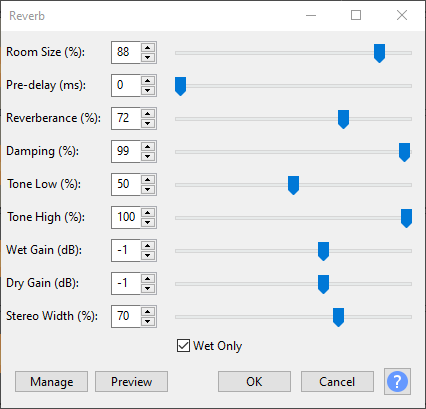
Reverb
Reverb made the vocal sound larger and less direct. The important thing with reverb was that it was applied on a duplicate vocal track with the "Wet Only" part checked so I could adjust the reverb without compromising on the clarity of the main vocal.
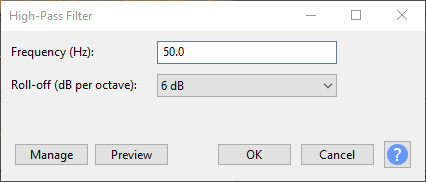
High-Pass filter
The only equalization I did on the vocals was a slight High-Pass filter on the low end at 50hz with a 6 dB roll-off on some songs which helped thin out my voice so it didn't sound so close.

Vocal layering
For two songs I had to layer two vocal tracks on each other to make them sound right. Luckily, I happened to have two separate recordings for both of these songs so they sounded realistic as I wasn't just using the same track twice. In this case my vocal layering was just using two lead vocals or a lead and a backing vocal both at the same pitch.
Final mixes
I mixed my vocals into the AI-isolated instrumentals of four songs:
- Martti Suosalo - Yötön Yö (Karaoke)
- Woods of Ypres - Traveling Alone (Karaoke)
- Jeff Williams ft. Casey Lee Williams - Wings (Karaoke)
- Jeff Williams ft. Casey Lee Williams - Home (Karaoke)
All of these mixes were done from a single vocal take per song, disregarding the parts where a layered vocal was used. To listen to them, you'll need to watch them on YouTube as they contain copyrighted music, which can only be played on YouTube without me facing difficulties:
Thoughts
I'm pretty happy with how these turned out, even to the point where I felt comfortable sharing them online. For the longest time I had tried to mix some of my recorded vocals, but I just lacked the knowledge on how to record good and easy to process vocals as well as how to do the processing itself.
I feel like my biggest issue with processing vocals beforehand was applying all the filters on the single vocal track, which degraded the clarity too much. The way I mixed the vocals in my AI voice conversion experiments was using this single vocal track technique, and I could've made them sound much better had I known to separate the reverb from the main vocal track. After learning that single fact from AudioHaze's vocal processing tutorial, I was able to get my vocals to sit on top of the instrumental much easier, and have them actually sound right.
Researching audio topics
I also felt getting to the point of understanding vocal processing like this was unnecessarily difficult due to the fact that there's just so much bloated content that rises to the top of search results. Searching "how to mix vocals" on YouTube results in dozens of videos with clickbait titles such as "How to Mix Vocals Like a Pro", "I Reveal How the Pro's Mix Vocals" & "Vocal Trick They All Use". The idea I get from those titles is that they have some proprietary information that you can only find after they "reveal" it to you, but in reality, it's just the basic fundamentals wrapped in a ton of bloat.
What I'm looking for is just the facts with some before and after results so I can make a conclusion if it sounds good or not. Instead, I'm served 10-20 minute videos filled with bloated content of the influencer talking about personal topics or easing you into the topic with the actual content starting at the 3-minute mark of the video and lasts till the end with a long outro. The reason I appreciate AudioHaze's tutorial is because he gets to the topic quickly and I've watched his videos here and there for a while to know he doesn't do clickbait or bloated content, so I'm willing to tune in for the 10 minutes that he has to explain the basics.